3. Organise your pages
Here are some tips for organising your content.
Change the page order
The sidebar on the left displays your pages in a hierarchy. If you have Space Administrator permissions you can click "Space Tools" > "Reorder Pages" to move pages around.
Add labels
Labels help keep pages organised and make it easier for you to find the information you need. Click "Labels" at the bottom of a page to add or edit. The "Related pages" section on this page uses labels too!
Make templates
Standardise and speed up the page creation process with templates. You can create and format a template with page layouts, standard headings and instructional text for hints and guidelines. Check out our sample page on "Making a template"
Related pages
1. Download and unpack the client API package
- The client API code is available on a public GitHub repository at https://github.com/eqeuscom/RICSamples.
- Please download the package from https://github.com/eqeuscom/RICSamples/archive/RICSamples_v1.1.zip
- Unpack the zip package into an empty folder
| Info | ||
|---|---|---|
| ||
The client API package contains the following:
|
2. Edit and run the demo application
- Open RICDemo.prg in VFP. At the top of the program, replace XFRX_CUSTOMER_NAME and XFRX_CUSTOMER_PWD constants with your XFRX customer username and password (this is the username and password you use to log in into www.eqeus.net/xfrx to download new xfrx versions)
- In the section below it, enter in the organization name you want to create, the subdomain it should run on, admin username and admin password. Alternatively, leave this code as is and it will create a new subdomain with a random name.
- Run RICDemo.prg. The new organization will be created, users and folders will be created, a report will be uploaded and some report level and folder level propertes will be set up.
- Then the demo application will pause so that you can view the demo organization online.
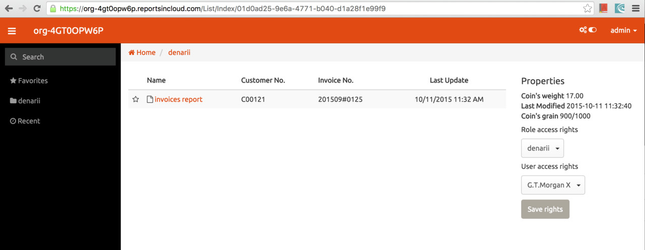
3. Open your report in the web browser
- Go to your new subdomain in reportsincloud.com (for example, if your subdomain is "mytest123", go to https://mytest123.reportsincloud.com
- Note: the RICDemo.prg puts the URL to the clipboard, so after you run it you can go to the web browser, select the address field and hit Ctrl+V.
- You will see the report you just uploaded in there.
- Here is a screenshot of what you should see m your screen:
4. Go to the administration console
- You can now go to the administration console at https://admin.reportsincloud.com and see the newly created organization there.
5. See how reportsincloud.com works for you.
- Give it a try. Add your report, add users, new domains. Link RIC to your desktop application.
6. Please let us know what you think
- Please let us know what you think, what works and what doesn't or what features you are missing at eqeus@eqeus.com.
| Panel | |
|---|---|
On this page:
|